
I’ve been blogging for a while now (liiiike 5ish years?) which is totally crazy. Of course, Ampersand has grown and changed since the beginning (you should have seen the first version! totally different) & it was only in the past 2ish years that I became “more serious” about blogging (read: consistently posting/promoting my content). Even though I’ve been blogging for a while, I still don’t consider myself an “expert blogger.” I’m always flattered/surprised when new bloggers reach out to me via email/social media and ask how I got started/any advice I have. It sorta got me thinking that maybe I do know a little something about blogging & I’ve finally created a “blogging routine” that I think may help new bloggers get started.
So if you’re new to blogging, 1. WELCOME! So glad you’re part of the blogging world and 2. here’s my blogging checklist aka the process I go through for every post. Of course, part of the fun of blogging is creating your own routine/process but use this as a place to get started. Still have questions? Comment below or shoot me an email!! I love meeting new bloggers :)
blogging necessities
Plan/Outline/Draft

One of the keys to blogging successfully is posting consistently. Any blogger will tell you that. Posting consistently helps you create a following & readers are more likely to come back when they know you’re creating new content week after week.
First, figure out what “consistent” means to you. For me, there was a time that I was posting twice a week (Tuesdays and Thursdays) but then my life got a little busy, so I bumped it down to once a week (Thursdays) with posting on Instagram a few times a week. If blogging is your hobby (like me!), figure out what realistically will work for you. Can you only commit to every other week? Once a month? As a hobby, blogging should be fun, not stressful. (If you want blogging to be your full time gig…little bit of a different story i.e. it’s a way bigger commitment. For more info on how to do that, I love this post by Erica from Coming up Roses!)
Now, to post consistently, obviously you need some ideas. When I was posting multiple times a week, I relied heavily on a content calendar. I tried a paper planner at first (since I love them for my normal everyday planning), but often found I would change my ideas A LOT so I switched to a digital calendar. Out of alllll the calendars I tried, I LOVE Asana. It’s free, easy to use & super clean/simple. Pick a time every month (like the first Friday or Saturday) and bang out your plans for that month. What holidays are coming up? What are other bloggers talking about? Are there any hot trends? What’s going on in your life that you wanna talk about? Ideas are everywhere. Once you get the creative juices flowing, your content calendar will fill up in no time.
Once you have a content calendar in place, time to start outlining/drafting. At any given time, I have 3-5 working drafts in WordPress. When I get an idea, I immediately create a draft and jot down a few bullet points/ideas. I find that writing a post is A LOT less intimating when you have something on the page vs. a blank screen with a blinking cursor. Highly recommend the WordPress app for inspiration on the go.
Soooo to recap:
- Figure out how often you want to post.
- Create a content calendar full of fun ideas.
- Start drafting/outlining right away/as soon as inspiration strikes.
Related: My favorite blogging apps!
Now once you have your ideas in place…
Take/Edit pictures

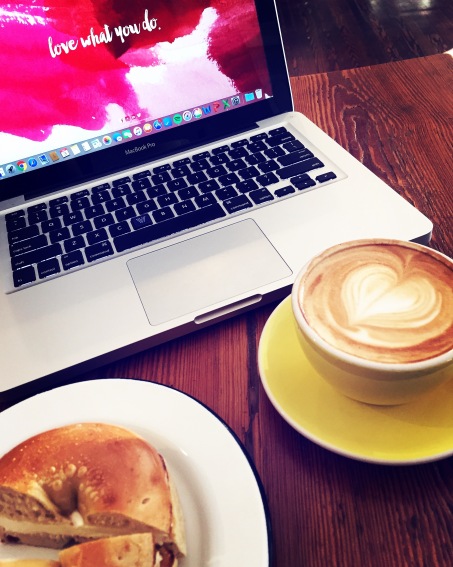
This is the fun part! Once you’ve got some ideas, time to take pictures! I’m in the habit of always snapping pictures of random things in my everyday life (a pretty latte, sunsets, my cute shoes, a puppy, etc.) because you never know when you’ll need it for content (and remember #bloggersneversleep). But if you have a specific idea for a post in mind, make sure you get some high quality pictures for your actual post/social media. I take most of my pics on my iPhone, but if you have a nice camera, obviously use it. For editing, I love VSCO and honestly the editing features on my phone aren’t half bad. Always take more pictures than you think you need. It’s easier to delete than recreate a photo shoot.
Write!

Alright, now that you’ve gotten your pics, head on back to your drafts and write. If you’re a blogger, I’m assuming you love to write too. This is the fun part. Get in the zone & knock it out. I love blogging because I can use my true, authentic voice. It’s not like writing for a publication/journalism where you have to fit a brand/voice. Your blog is YOURS. Make it sound however you want. Enjoy the freedom of just writing.
Add media & Format/Edit

Once you have all your words out, add your media. This might be your pictures, gifs, videos, downloadable content, etc. Also spend some time formatting. Use the different headers. Break up long paragraphs with photos. Bold key points. Every blog will have a different style, so keep it consistent & make it look pretty/easy to read.
Link Link Link

I did NOT do this when I first started blogging, and it was a huge mistake. If you want to attract new readers & engage your current readers, you need to use links, both external & internal. External links (those linking out to other blogs, articles, videos, etc.) can help search engines find your blog/boost your SEO. Internal links (those linking to your other blog posts) give readers an easy way to discover your other content/keep them on your blog for longer. If you’ve spent time on Amperand (hehe thanks!), you’ll notice I’ll do “Related” line and link to another article (example below!) or “In case you missed it” at the end of posts with links to my most recent posts. I’ll also link key words throughout the post to other blogs I love/my past blog posts that are relevant. It’s tedious but so so important!
Related: The truth behind being a blogger
Add key words/categories

You’re almost there! After you’re basically done with all the writing, picture-taking, editing, and linking, take some time to add some key words and categories. It helps organize your blog & make it easier for readers to find related posts.
Share to social media

Click publish. Yay! It’s live. Now you have to make sure you promote it. Every blog I write gets shared to Facebook, Twitter and Instagram. If you haven’t downloaded it already, download IFTTT RIGHT NOW. It’s an app that helps your other apps work together and lets you do things automatically. For example, I set up a rule that if a blog post goes live, it automatically gets tweeted from my Twitter handle. So easy. Figure out where you want to promote your blog posts & share away. Some quick social media tips:
- Create a Facebook Page for your blog. It allows you to schedule posts & track insights = v helpful.
- Create a separate Instagram profile for your blog. This way you can promote your blog as much as you want & connect with other bloggers/brands directly. While you can’t schedule Instagram posts through the app, here are some cool apps to help you lay out your feed.
- Figure out WHERE your readers are and promote there. Don’t spin your wheels posting to EVERY social media channel if your readers aren’t there. I know for me, people find my blog via Facebook and Instagram, so I post there most often. I still tweet, but most of my energy is devoted to FB and Insta.
- Don’t be afraid to promote yourself! Seriously, I was so shy about sharing my blog when I first started (What if people hate it?? What if they feel like I’m spamming them!) but you’ll find that people actually want to read what you write and if they don’t, they don’t have to click on your link/follow you blog’s social media handles. Blogging takes a lot of work–people should read what you write!
Also, for FB particular, find some blogging groups where you can promote your content/meet other bloggers! Every time you have a new post, share it to that group. I personally love InfluenceHer Collective.
Finally, when I’m done sharing on social, I spend some time on Pinterest. Ask any blogger, Pinterest is CRUCIAL. It helps people find your blog without you really putting in that much effort. I create all my pins on Canva (SO easy to use/FREE. It’s like Photoshop for dummies) & I use the same format to 1. make it easier to switch out content and 2. create a look/brand. Like Facebook, join other blogger boards to share your pins and connect with other bloggers. It’s a super good way to get your content out there. Finally, if you want to spend a little money, bloggers RAVE about Tailwind, a Pinterest scheduler so your pins get promoted/posted without you doing anything.
Phew! Sorry for the long winded post. If you want a watered down version of this checklist to reference every time you write, download this cute lil PDF checklist here! Again, LMK if you have any questions about the blogging world. I’d love to connect! &.

need to save this pin for later. Even as an experienced blogger this is still full of tips that are helpful even now!
LikeLiked by 1 person
I’m so glad they were helpful!! Can’t wait to check out your blog too :) Thanks for reading! xo, Kasia
LikeLiked by 1 person
Thank you, fairly new to blogging g and have a couple of take-always from this.
LikeLiked by 1 person
Welcome to the blogging world! I’m so glad it helped :) Thanks for reading. xo, Kasia
LikeLike
Thanks for sharing your expertize!!
LikeLiked by 1 person
Thank you for reading!! Xo
LikeLiked by 1 person
I’ve really had a hard time with this blogging because am really not sure if maybe anyone’s going through it….and it makes me feel like maybe am just doing nothing..but thanks a lot for the advice…it has really helped me
LikeLiked by 1 person
I’m so happy some of my advice helped you!! Thanks for reading. Keep at it! Blogging gets easier the more you do it :)
LikeLiked by 1 person
Loved the blog great advice. Have a look at my blog see what you think. I appreciate any comments you make thanks
LikeLiked by 1 person
I will check it out!!
LikeLike